|
|
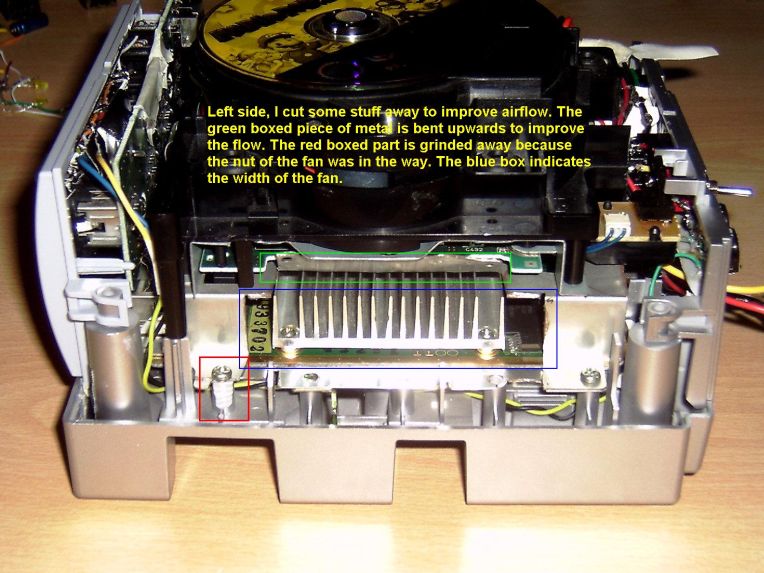
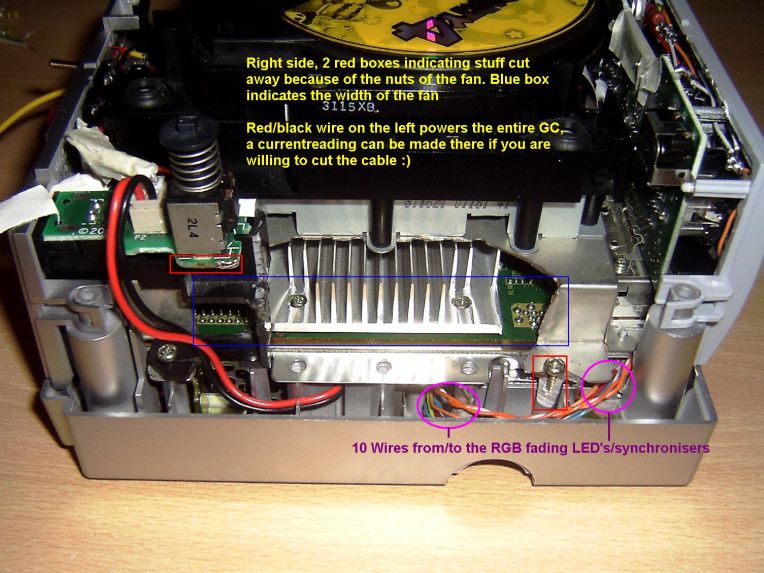
Old photos of my Gamecube Before my Gamecube looked like the way it does now, it took a lot of experimenting to get the various things to work properly. When I started modding my cube I didn't know what it would look like in the end. The ideas just came pooring in while working on it. I took some pictures now and then. Back then I only had a very crappy digital camera. Sometimes I used my even crappier webcam to take some shots, oh well... Check my experimental photos: Casefans - The first things I modded to my Gamecube where the fans. The sound of the original small one annoyed me so I looked for a solution. I replaced it with two 80mm ones that each run at a peaceful 6V. On the right picture you can see the original fan and also and also an extra slim Zalman OP1 fan. If I would have had a black cube I would have used that fan.
------------------------------------------------------------------------------------------------------------- See through jewel - After the fans I started modding the jewel. I took out the original one and painstakingly polished the acrylic disc with toothpaste to make it clear. Then I cut a hole in the lid and I made a small ring of cardboard on which the disc could rest. The result was a see through jewel. It's fun to be able to see the laser shining through the game disc, all the way to the roof.
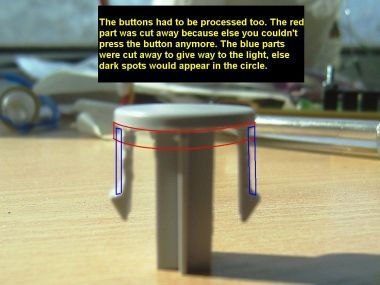
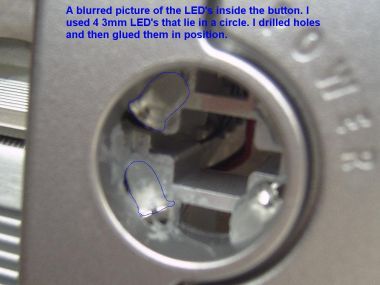
------------------------------------------------------------------------------------------------------------- LED light disc - Before I found out where to get white CCFL rings, I used LEDs to illuminate the disc. The results where good, but it was a lot of work to make. As usual I learned a lot of it. ------------------------------------------------------------------------------------------------------------- Behind the buttons - Each of the three buttons has four LEDs that illuminates it. These are bright LEDs and those usually come with clear lenses. Luckily it only takes a piece of sandpaper to diffuse the lenses, which makes the light spread more evenly. ------------------------------------------------------------------------------------------------------------- Backside of the front panel - Wiring 22 LEDs with resistors and still making it fit... yes it's hard.
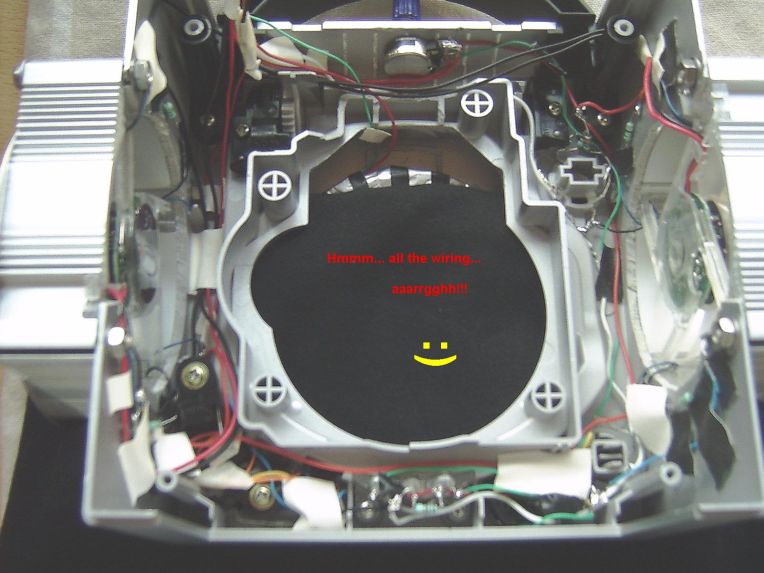
------------------------------------------------------------------------------------------------------------- Inside shots - I finish with these interior shots. The biggest challenge was to make everything fit and work. The Gamecube is a small and compact device. Apparently I somehow found a way to place the LEDs and wire them up. I know it doesn't look very neet on the inside, but who cares?
|
|||